docs

How to select color in theme?

How to select color in theme?

1 – We use tachyons Libary for Hsblog theme. So, the theme color the same tachyons color. view more: https://tachyons.io/docs/themes/skins/.

2 – The colors name have “–not-NighMode” in the tail is these colors will not change while enabling night mode. Because the somewhere you will do not want to change color when enabling night mode.

docs

Setting up HsBlog Mega Menu

To setup Mega Menu, please do the following steps:

  1. From the admin sidebar, click on Appearance
  2. Then click on Menu
  3. Click Create on Menu button
  4. After finishing your setup, Check to Main Menu and click Save Changes

1 – Dropdown Menu

  1. Add a menu item to Menu area
  2. Expand this menu, you will see Variation settings: Select Dropdown option.
  3. Page Icon: You can use Font Awesome 4.7 to set up an icon here. Then set Menu Navigation to style6.
  4. Now, add some menu items as its children
  5. Click Save Changes

2 – List – MegaMenu

  1. Add a Menu to Menu setting area
  2. Expand this menu, you will Variation settings: Select List option.
  3. Page Icon: If you want to set up an icon to this menu, please use Style6, then You can use Font Awesome 4.7 to set up an icon here.
  4. Add some menu items as its children
  5. Finally, click Save button

3 – Tab – MegaMenu

  1. Add a Menu to Menu setting area
  2. Expand this menu, you will Variation settings: Select Tab option.
  3. Page Icon: If you want to set up an icon to this menu, please use Style6, then You can use Font Awesome 4.7 to set up an icon here.
  4. Add some menu items (only category) as its children
  5. Finally, click Save button

4 – Grid – MegaMenu

  1. Add a Menu (only category) to Menu setting area
  2. Expand this menu, you will Variation settings: Select the Grid option.
  3. Page Icon: If you want to set up an icon to this menu, please use Style6, then You can use Font Awesome 4.7 to set up an icon here.
  4. Finally, click Save button

docs

Get API Key for YouTube

Get API Key for YouTube

With the new rules and API version 3 changes YouTube is requiring all users that want to view videos outside of YouTubes website to register and create a Project to access the API. The good news is this process is fairly simple.In order for you to get the YouTube feed working you need an API Key. Here is the process to obtain that.

  1. Go to https://developers.google.com/ and log in or create an account, if necessary.
  2. After logging in go to this link https://console.developers.google.com/project and click on the blue CREATE PROJECT button as depicted in the photo below. Wait a moment as google prepares your project.
  3. Fill in whatever Project Name you want.
  4. Then click GoogleAPIs link in the top left corner and then click the link option called “YouTube Data API.” It’s under YouTube API’s. You can see it highlighted in the photo below, bottom right.
  5. Now click on the “ENABLE” button.
  6. Next click on the blue ‘Go to Credentials’ button to the right.
  7. Choose the select option YouTube Data API v3 for the first select option and Web server(e.g. node js. Tomcat) for the second selection. Then choose Public data. Now click the blue button, “What credentials do I need?.”
  8. Almost done, wait for google to create your new project and you should see the screen below where you can copy your API Key. 

docs

How To Get An App ID and Secret Key From Facebook

How To Get An App ID and Secret Key From Facebook

How To Create A Simple Facebook App to Receive an App ID and Secret Key

In order to get an App ID and Secret Key from Facebook, you’ll need to register a new application. Don’t worry – its very easy, and your application doesn’t need to do anything. We only need the keys.

There are 4 simple steps to creating a Facebook App, which we’ve outlined below.

Step One: Visit The Facebook Developers Page

To start with, navigate your browser to the Facebook Developers page. You’ll need to login to your Facebook account.

Once logged in, you’ll see a screen similar to this:

Screenshot of developers.facebook.com
Click the “Add a New App” link to get started.

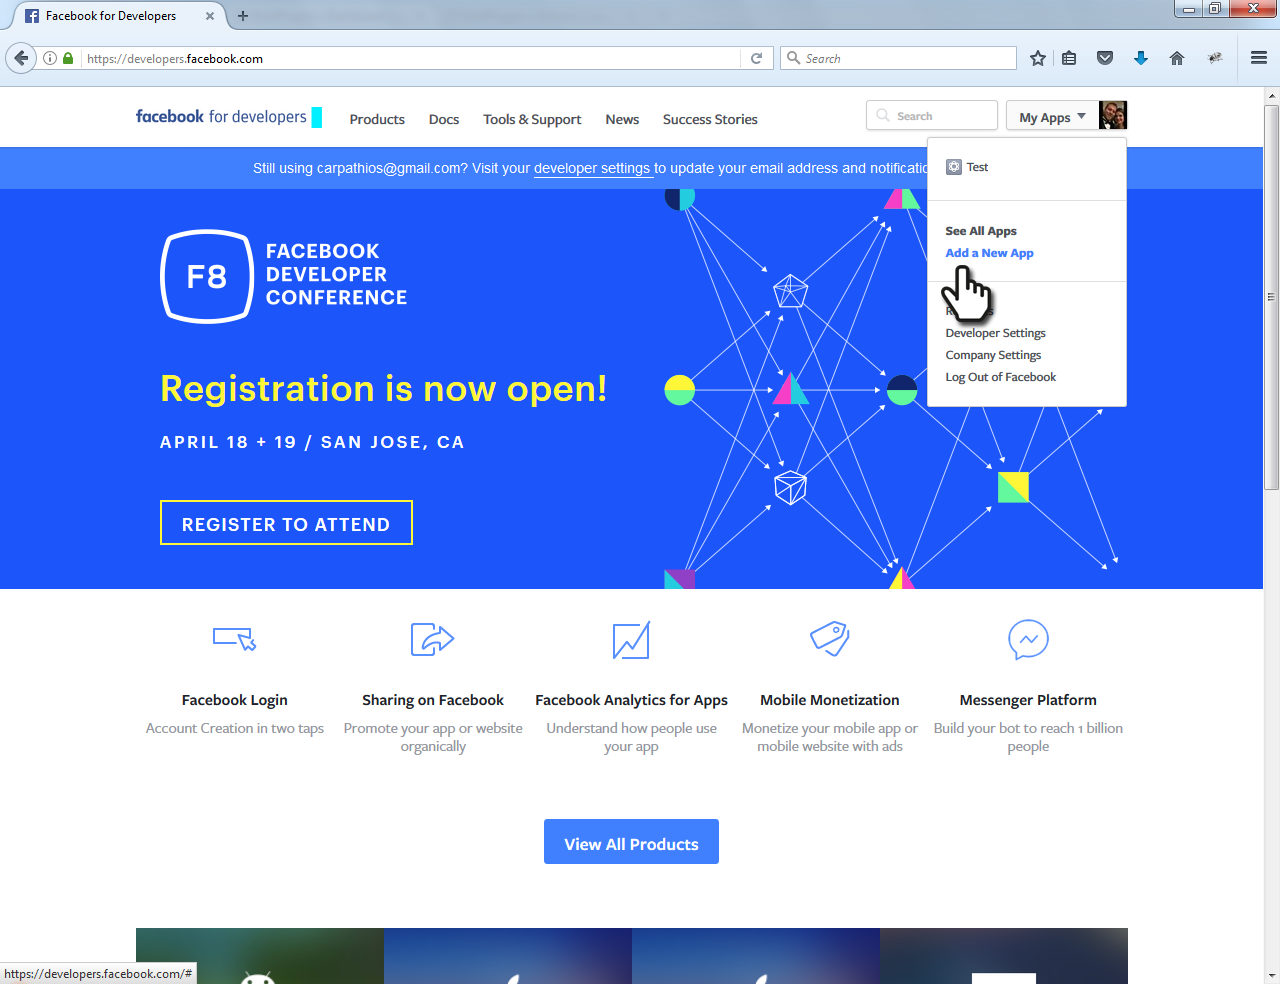
To begin, click the green “Add a New App” link in the top right menu.

Step Two: Input Your New App’s Information

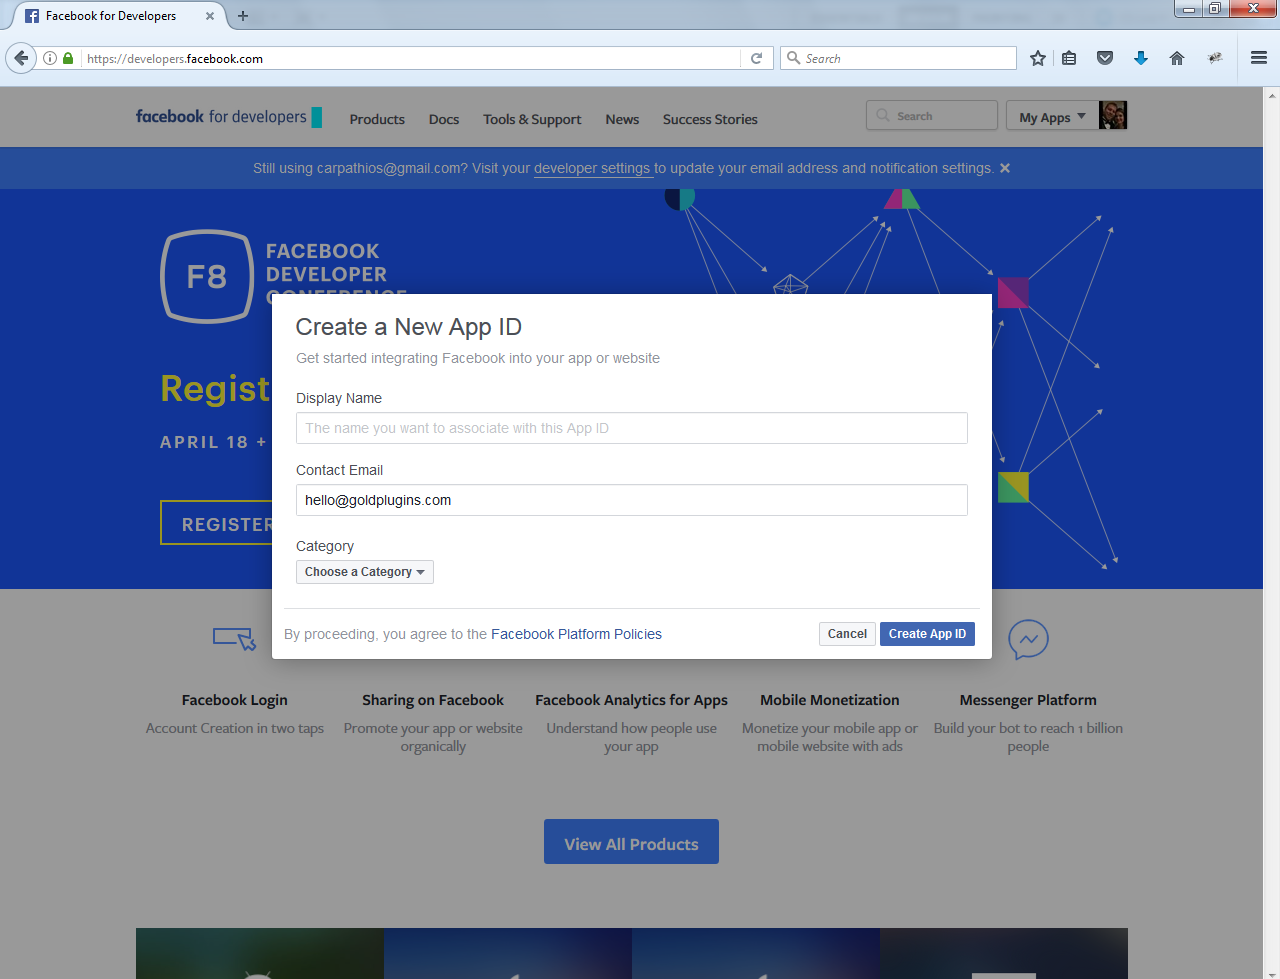
Once you’ve clicked “Add a New App”, a box will appear asking you for your new App’s Display Name, Contact E-Mail Address, and Category. Since this App won’t be published, just pick a name that is easy for you to remember.

Screenshot of Add a New App modal.
These are the fields you will see after clicking Add a New App. They are the Display name, Contact E-Mail, and Category.

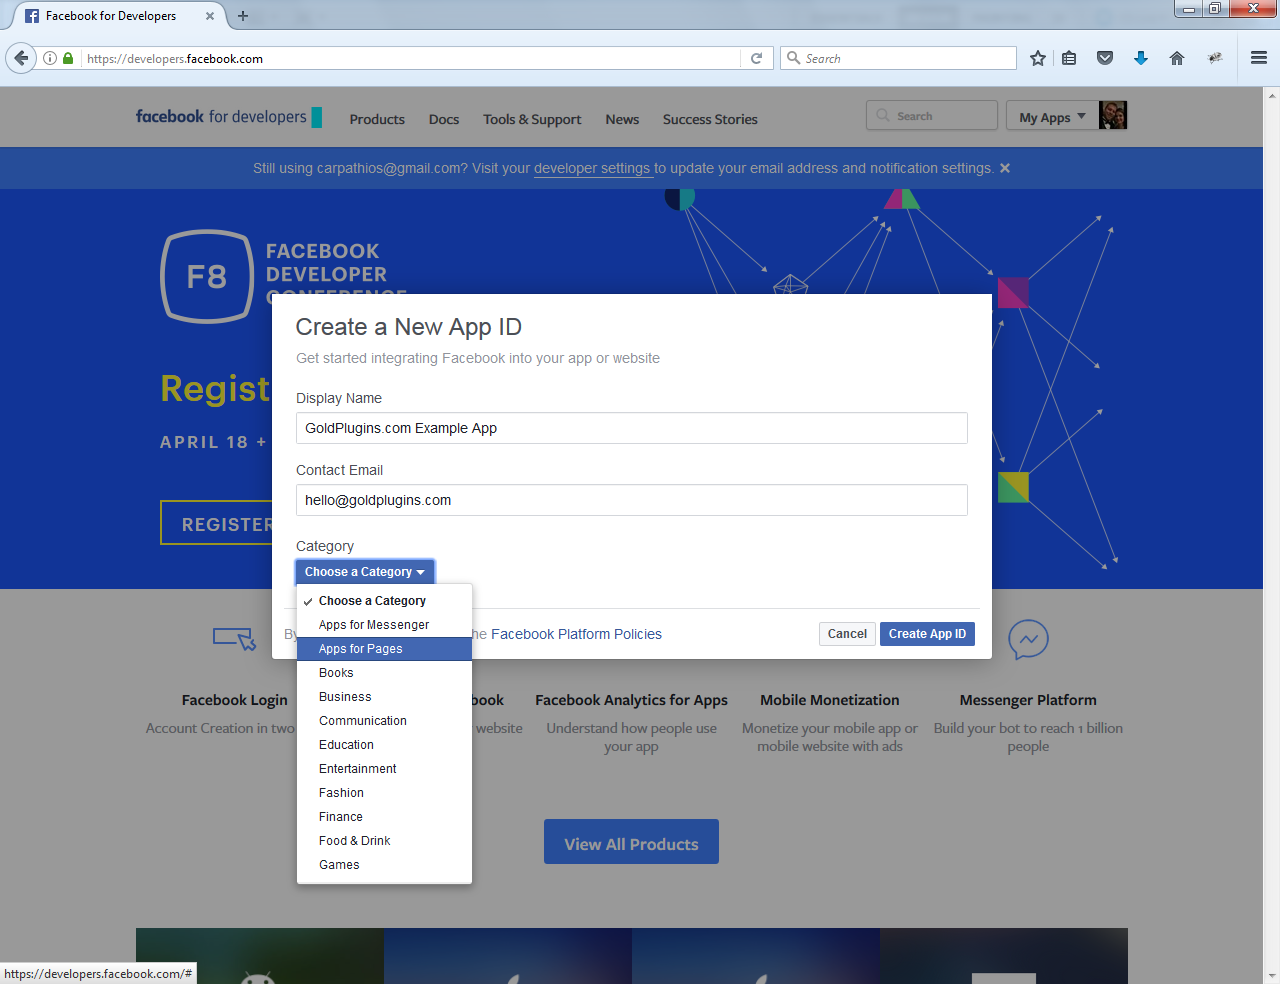
You will be asked to choose a Category for your App — choose Apps for Pages.

Screenshot of Add a New App Category drop down.
Once you’ve filled out the required fields, be sure you’ve selected Apps for Pages in the category drop down.

Step Three: Locate and Copy your App ID and Secret Key

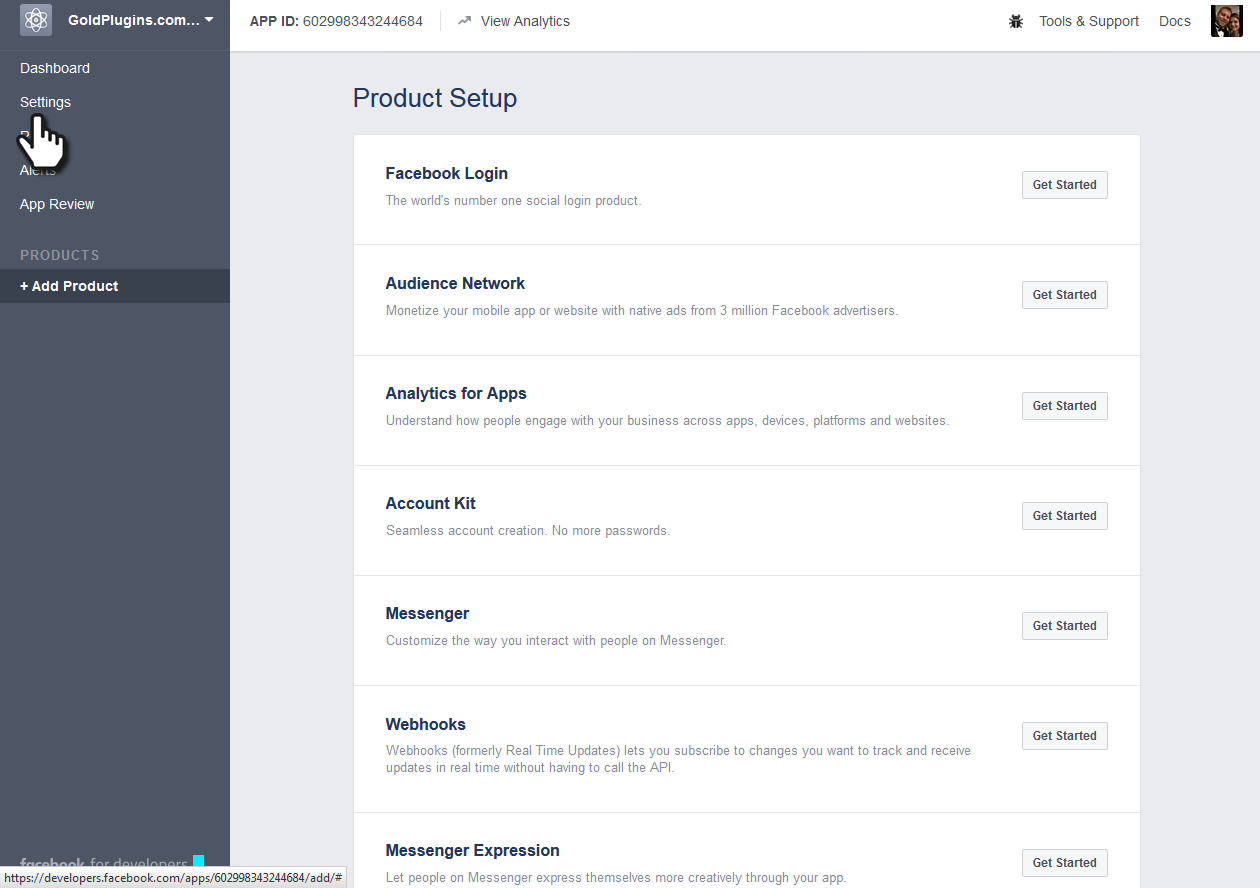
After you’ve filled out the required fields and clicked Create a New App ID, you’ll be taken to your new App’s dashboard. From here, you’ll need to click on the Settings link to view your App ID and Secret Key.

Screenshot of new App's Dashboard.
This is the new App’s Dashboard. Click the Settings link on the left to proceed to your App ID and Secret Key.

Your Secret Key will be hidden from view until you click the Show button.

Screenshot of new App's Settings
Your Secret Key is hidden from view until you click the Show button.

Once you’ve done this, we recommend copying both fields to a text file for easy access later.

Screenshot of new App's Settings with Secret Key revealed.
After clicking Show, your Secret Key will be visible to copy.

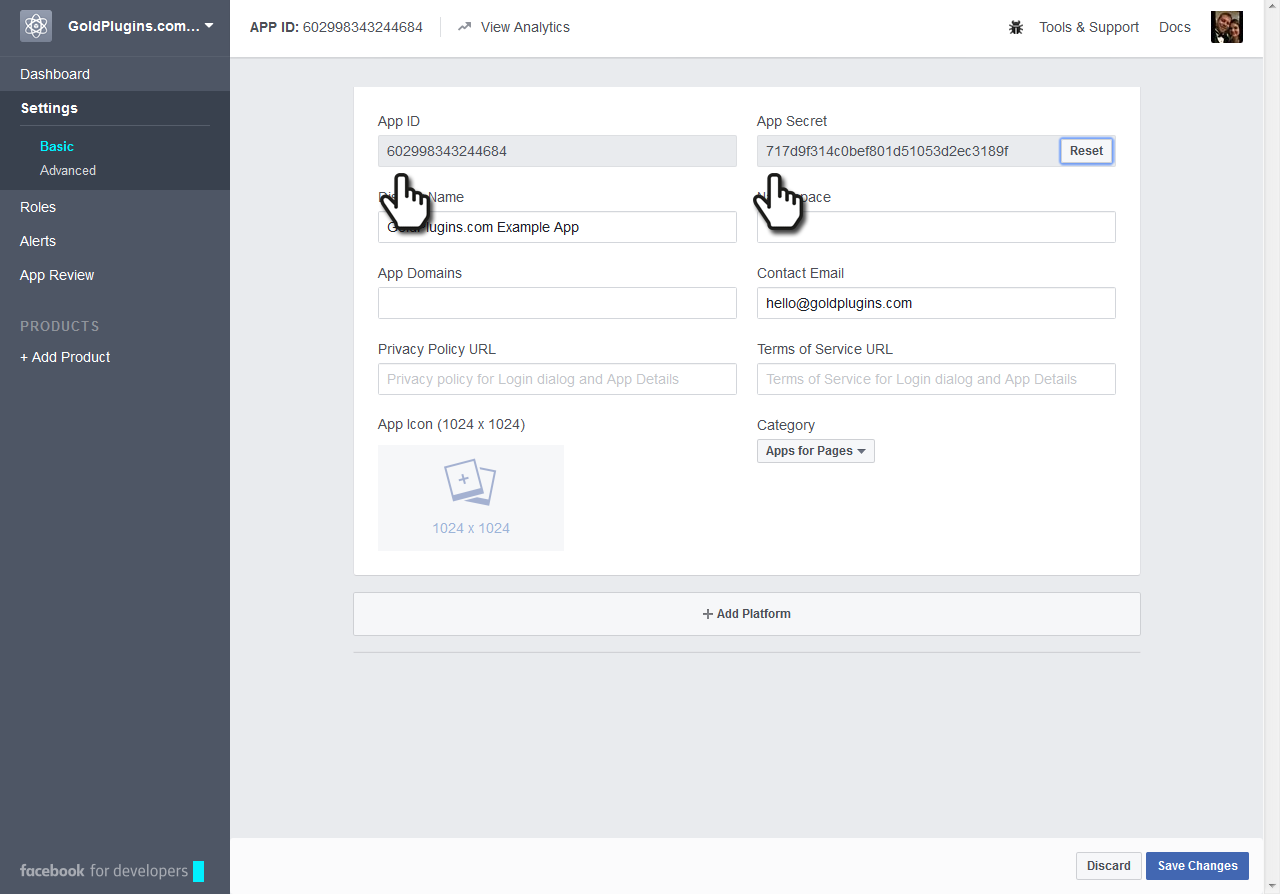
You’re finished! That’s all there is to generating an App ID and Secret Key from Facebook. You can ignore the other settings.

docs

Setting up Twitter API

How can I get a Twitter Consumer Key and Consumer Secret key?

Getting the Twitter Consumer Key (API Key) and Consumer Secret key is very simple, just follow the below 4 steps and you are ready to go.

  1. Go to https://dev.twitter.com/apps/new and log in, if necessary
  2. Supply the necessary required fields, accept the Terms Of Service, and solve the CAPTCHA.
  3. Submit the form
  4. Go to the API Keys tab, there you will find your Consumer key and Consumer secret keys.
  5. Copy the consumer key (API key) and consumer secret from the screen into our application.

docs

General settings (Sidebar, Archive page, Color, Fonts, Menu Mobile)

1 – General settings

  1. From the admin sidebar, Click on Appearance
  2. Click on Theme Options
  3. Click on General Settings
  4. Click on General tab

2 – Sidebar

  1. From the admin sidebar, Click on Appearance
  2. Click on Theme Options
  3. Click on General Settings
  4. Click on Sidebar tab

3 – Archive Page

  1. From the admin sidebar, Click on Appearance
  2. Then click on Theme Options
  3. Next, click on General Settings
  4. Finally, click on Archive page tab

4 – Page Color

  1. Click on Appearance
  2. Click  on Theme Options
  3. Click on General Settings
  4. Click on Page Color tab

5 – Page Fonts

  1. Click Appearance
  2. Click Theme Options
  3. Click General Settings
  4. Click Page Fonts tab

6 – Menu Responsive

  1. Click on Appearance
  2. Click on Theme Options
  3. Click on General Settings
  4. Click on Menu Responsive tab.

docs

Get Instagram App ID and Instagram App Secret

Get Instagram App ID and Instagram App Secret

  1. Access Token (Skip over this field. We will insert it after you are inputed two of field App ID and App Scret)
  2. Instagram App ID
  3. Instagram App Secret
  4. Cache Interval (Insert time of Cache – second)

1 – Please follow to https://developers.facebook.com/apps/ and login to facebook accout if you are not already logged. Then, Click to Add a New App button

2 – Insert Display Name, Contact Email and click Creat App ID button

3 – Click to Settup to Instagram

4 – On side left, please click to Settings then click to Basic. Fill in the input fields and click to button Update at under last of page.

5 – Please coppy Instagram App ID and Instagram App Secret and paste them to Instagram settings on theme options settings.

ThankYou!